Mastering the Art: A Passionate Fisher’s Guide on How to Set Up a Fishing Pole
🎣 First Catch: My Love Affair with Fishing Begins 🎣
Man has been hunting fish and using a primitive fishing rod since ancient times. Back then, there was no solid line and no hook. At first, the fishing line was tied to a rod, then there were rings to guide the line. The next step was the invention of the reel so that the long line would not get tangled.
There’s a magic moment that hooks every fisher – my own was at the tender age of ten. 🧒 On a serene summer morning, with the sun barely breaking over the horizon, I cast my line into the glassy water for the first time. Within seconds, I felt a tug. The fight, the anticipation, and the thrill of reeling in that first catch – it was pure euphoria. It was a modest perch, but to me, it was a leviathan victory. 🏆 That day, I fell in love with fishing, and it’s a romance that’s been alive ever since.
Fishing isn’t just a hobby; it’s a passion and a lifestyle, one that brings solace, excitement, and a deep connection to nature. 🌳 But, every angler knows that to fully enjoy these feelings, the gear must work in harmony with the fisher. And the first step towards this harmony is setting up your fishing pole correctly.
Setting the Stage: Why Your Fishing Pole Setup Matters
The joy of fishing can quickly turn into frustration if your fishing pole isn’t set up correctly.🤯 Ever dealt with a tangled line, snapped fishing rod, or even worse, lost a catch due to faulty setup? I’ve been there, and I can assure you, a properly set fishing pole can make all the difference between a triumphant day and a fruitless frustration.🥇
So, whether you’re a seasoned angler looking to perfect your setup or a newbie eager to make your first catch, this guide is for you. 📘 I’ll be sharing the insights I’ve gained over my years of fishing – detailing each step of setting up a fishing pole, choosing the right tackle, perfecting your casting and reeling techniques, and avoiding common mistakes.
🔶Ready to dive into the world of fishing? 🎣 The water’s fine, and the fish are biting! Let’s set the stage for countless successful catches.
Understanding Your Fishing Pole
🎣 Pole Parts Uncovered: The Anatomy of Your Fishing Pole 🎣
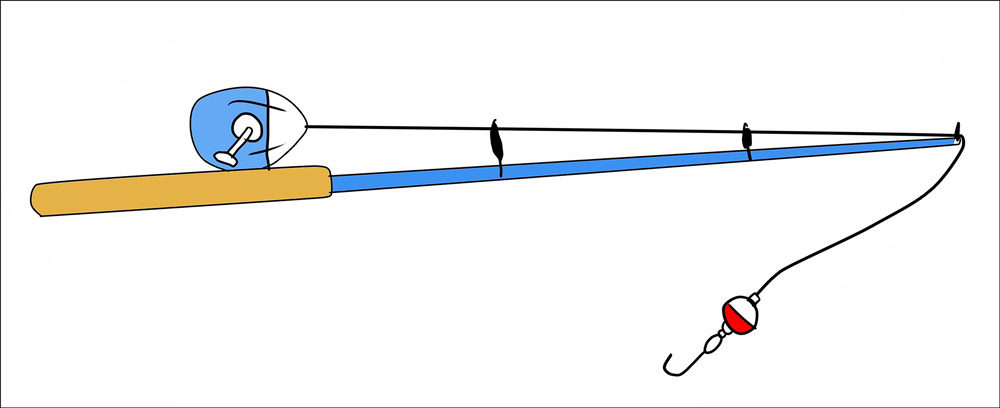
Before diving into assembling your fishing pole, it’s vital to understand the anatomy of this essential tool. Each part of the fishing pole has a specific function that works together to ensure a smooth fishing experience. Here’s a rundown of the main components:
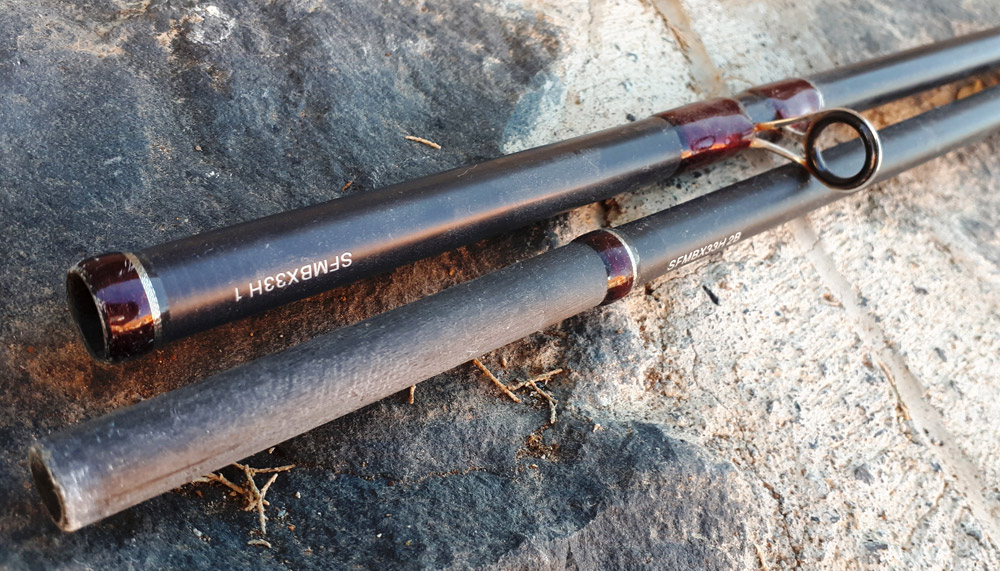
- Rod: The backbone of your fishing pole, usually made from materials like fiberglass, graphite, or composite. The length, power, and action of the rod affect casting distance and handling of the fish.
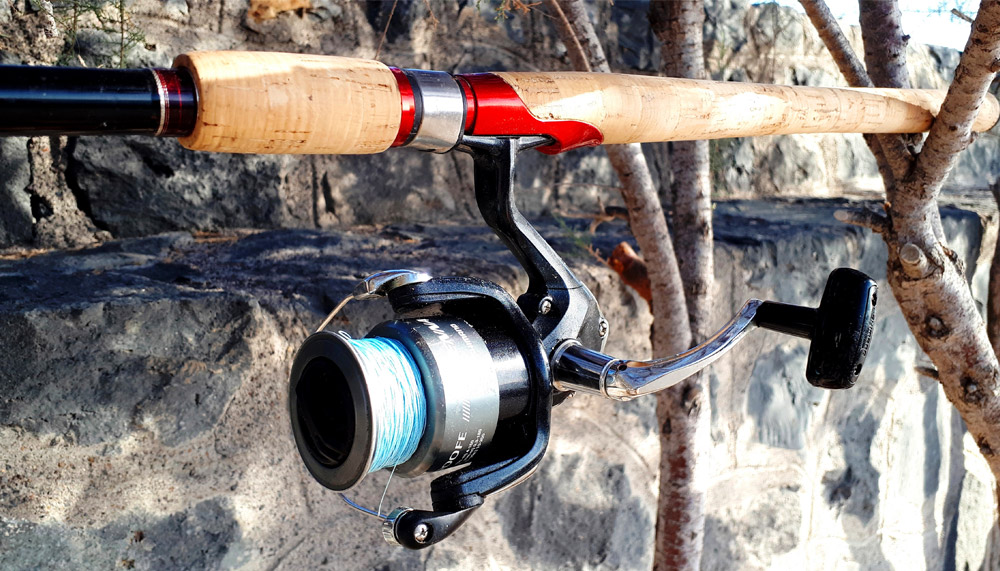
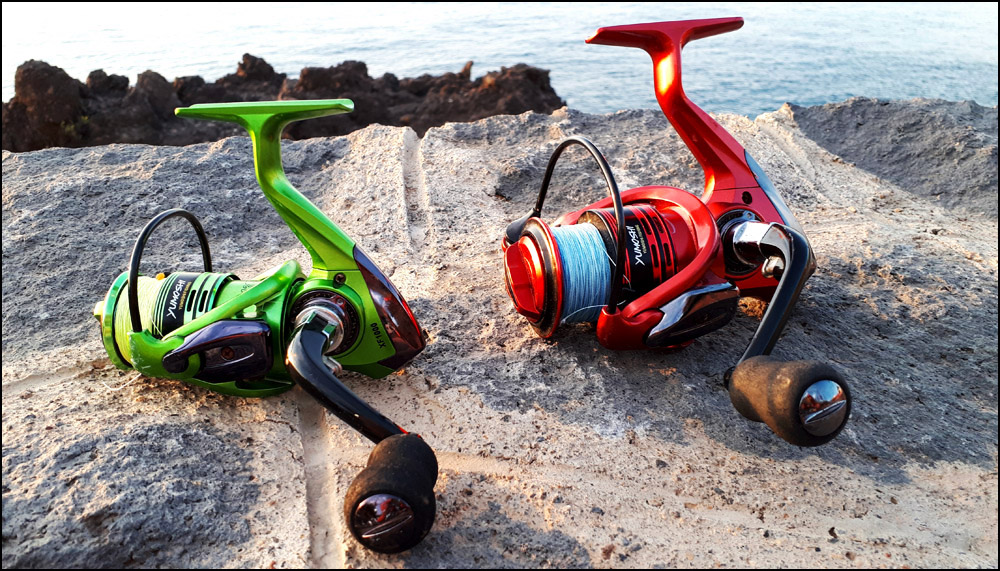
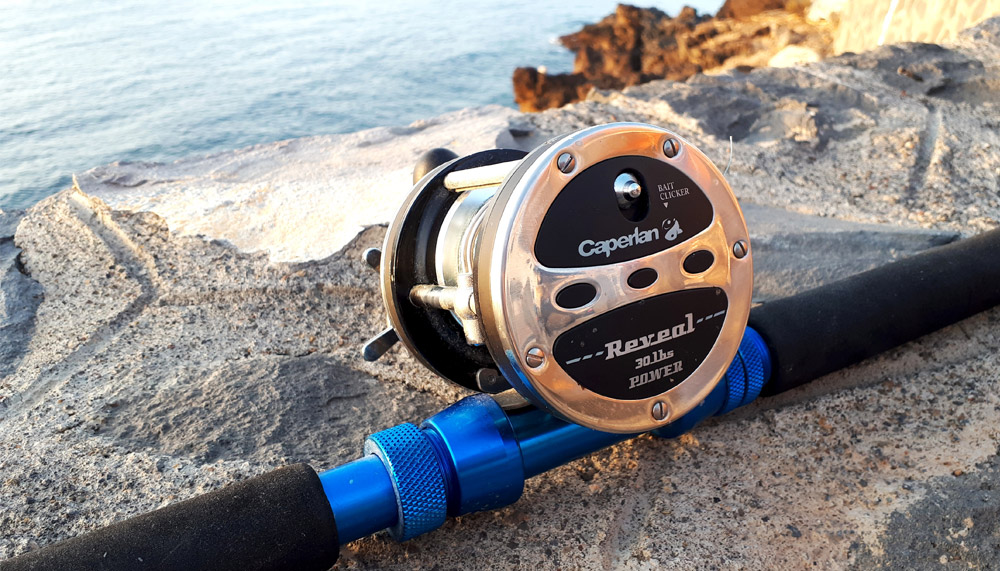
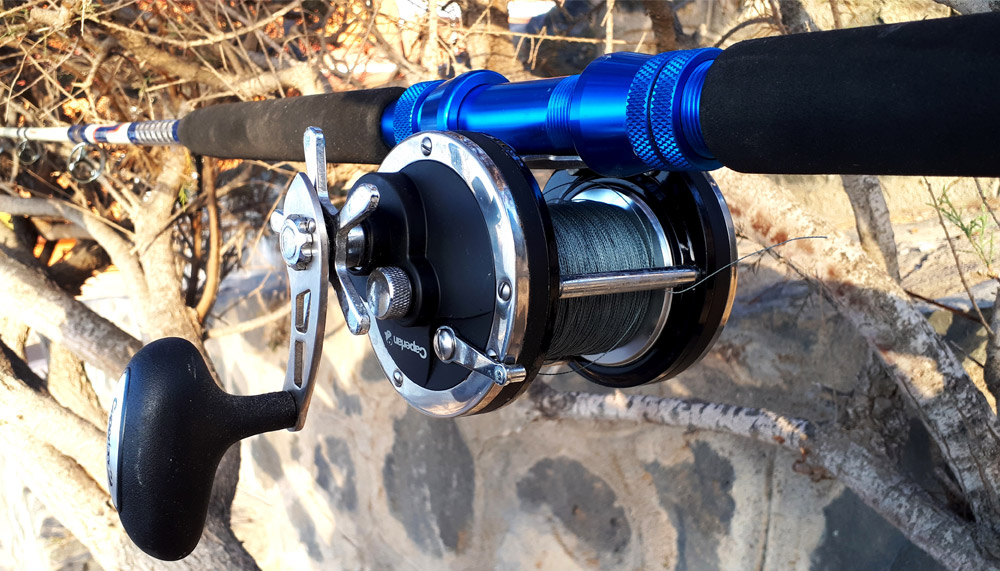
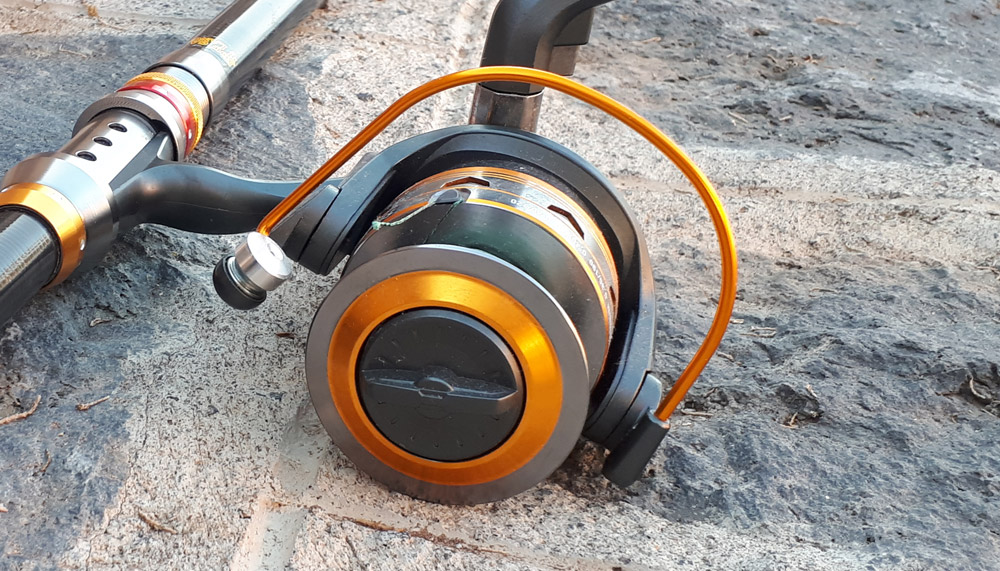
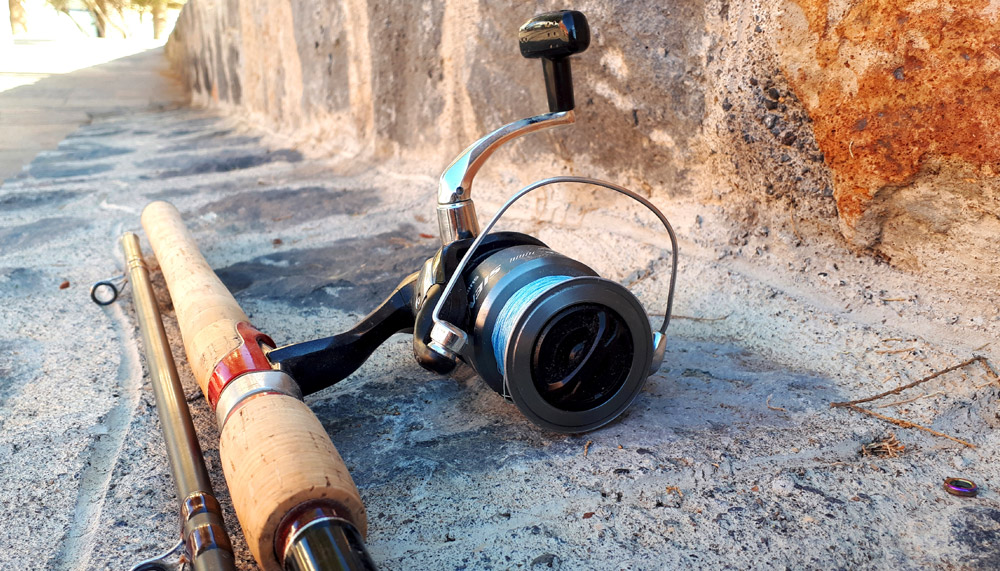
- Reel: This device holds, releases, and collects your fishing line. There are two common types: the spinning reel and the baitcasting reel.
- Handle or Grip: The part you hold. It can be made from cork, EVA foam, or other materials. Its design influences the pole’s balance and comfort during fishing.
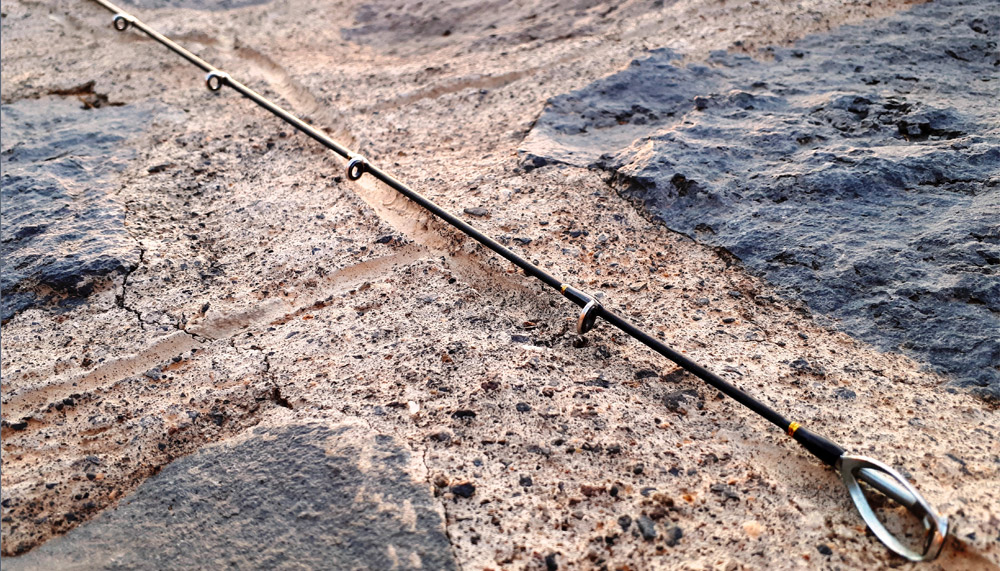
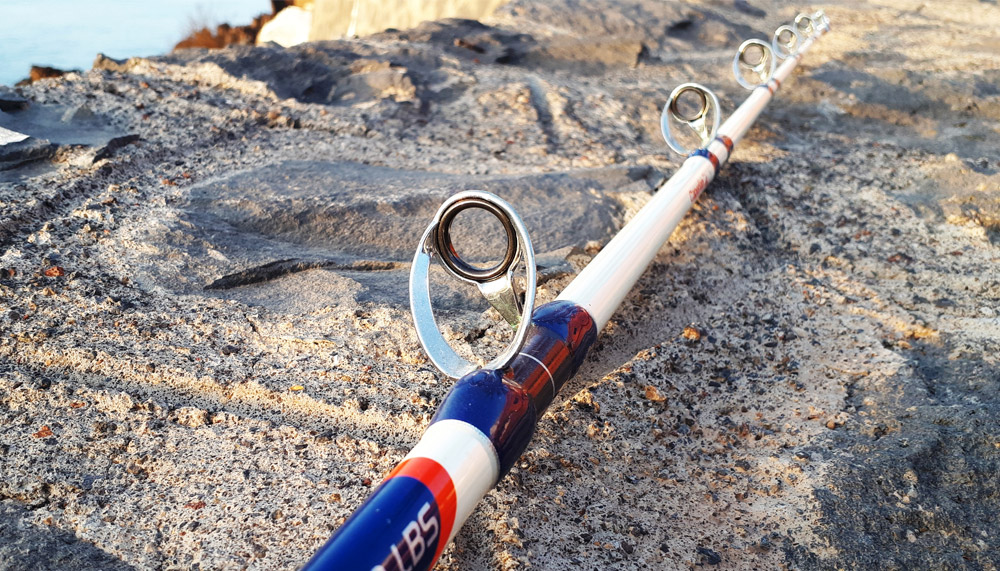
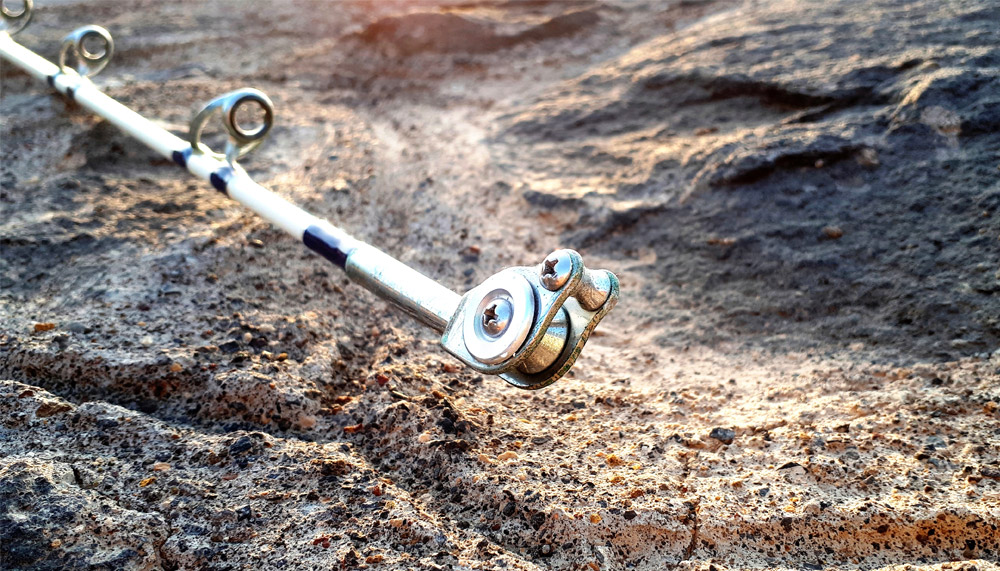
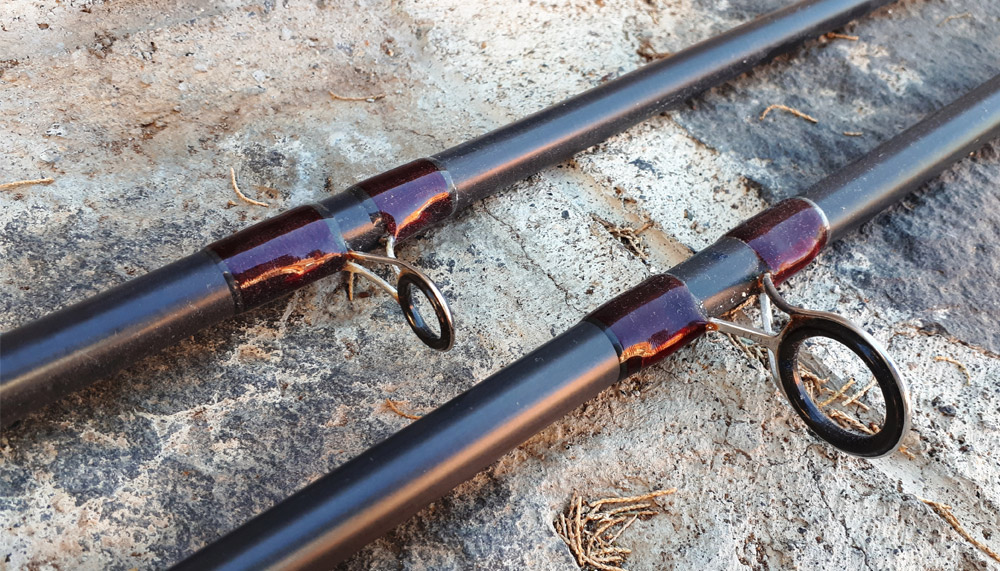
- Guides: These are the circular loops running down the length of your rod. They direct the line from the reel to the rod tip and distribute stress along the rod when you hook a fish.
Tip: The very end of the fishing rod. It’s flexible and responsive, helping detect when a fish bites.
Knowing these parts and their functions will serve you well when setting up your pole and handling unexpected issues that might crop up while fishing.
🐠 Comparing Poles: Choosing the Right Rod for the Job 🐠
Fishing poles come in all shapes and sizes, and it’s essential to choose the right one for your environment and target fish. Here’s a brief overview of the most common types:
- Spinning Rods: Ideal for beginners, they are versatile and can be used in various environments, from freshwater streams to ocean piers.
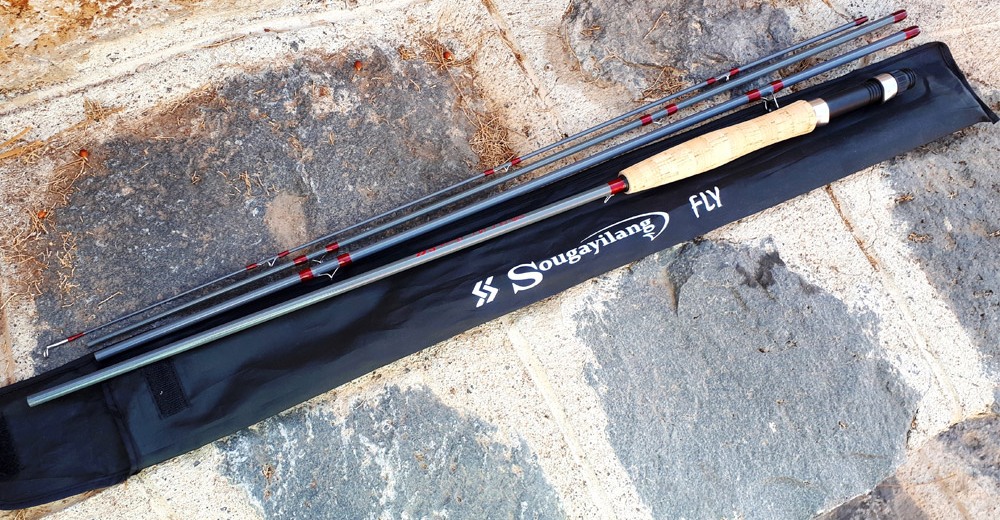
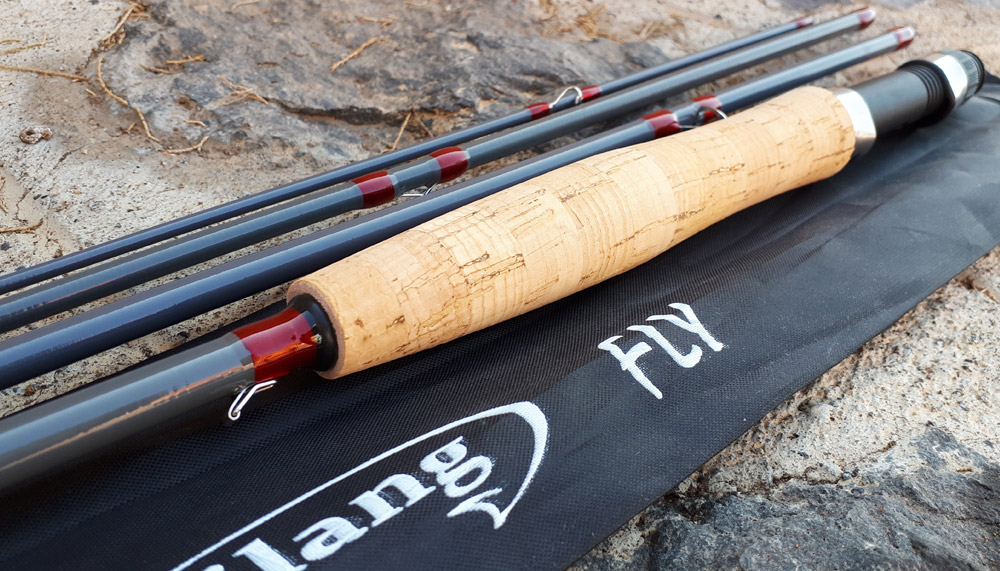
- Fly Rods: Specifically designed for fly fishing, they are flexible and lightweight. Best for freshwater environments like rivers and streams.
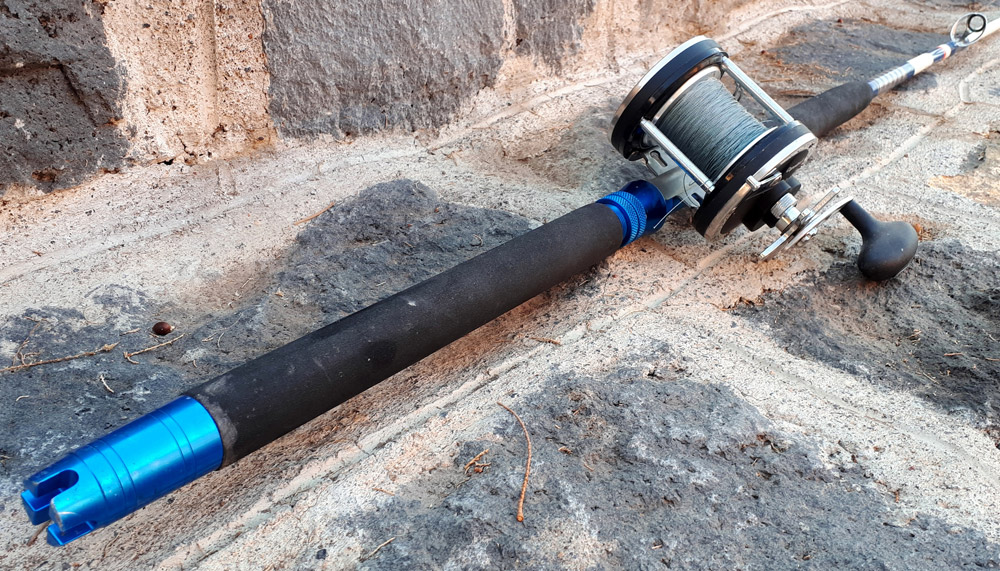
- Casting Rods: Available as baitcasting or spin casting rods, they are designed for accuracy and longer casting distances. Suitable for both freshwater and saltwater fishing.
- Trolling Rods: Heavy-duty rods designed to drag bait through water, typically from a moving boat. Best for deep-sea fishing or larger freshwater species.
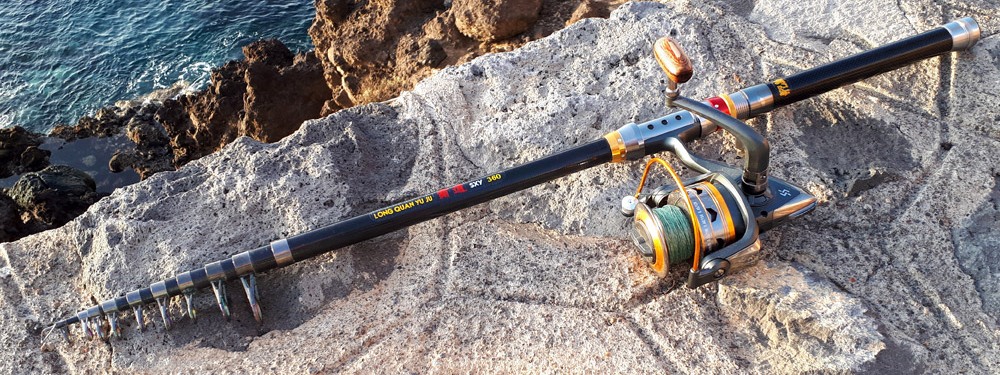
- Telescopic Rods: These rods can extend and retract, making them perfect for travelers or backpackers.
🔶Remember, each fishing pole has its unique strengths. Choosing the right one depends on your skill level, the fishing environment, and the type of fish you’re hoping to catch. The right pole will make your fishing experience more enjoyable and productive! 🐟
The Art of Assembling Your Fishing Pole

🎣 Piece by Piece: Building Your Fishing Pole the Right Way 🎣
Setting up your fishing pole may seem daunting at first, but once you master the art, it’s as smooth as casting a perfect line. Let’s walk through the process step-by-step:
- Attach the Reel to the Rod: Find the reel seat on the rod handle and place the reel foot into it. Tighten the seat until the reel is secure. Remember, it should be snug but not overly tightened, to prevent damage. 🛠️
- Thread the Fishing Line: Start from the rod tip and go downwards. Thread your fishing line through each of the rod guides. Ensure the line is smooth and without tangles for a perfect cast. 🧵
- Connect the Line to the Reel: Open the bail on your reel, tie your line onto the reel using an arbor knot, and close the bail. Start reeling slowly, making sure the line is winding onto the reel evenly.
- Setting up the Tackle: Depending on your fishing environment and target fish, attach the right hook, bait, sinker, or float to your line. This is where the magic happens – choosing the right tackle can greatly increase your chances of a successful catch. 🎣
🎣 Insider’s Tips: Years of Experience in Every Knot and Loop 🎣
Over the years, I’ve picked up a few tricks that might make your setup process even smoother:
- Always inspect your fishing line for wear and tear. A weakened line can snap, causing you to lose your catch.
- Keep your fishing pole clean and maintained. Rinse off saltwater, mud, or dirt after each fishing trip.
- Practice your knots. A secure knot can mean the difference between a successful catch and disappointment.
- Customize your rig depending on the fish you’re targeting. What works for a catfish might not work for a trout.
🔶Remember, setting up your fishing pole is the first step towards a fruitful fishing trip. Take your time and do it right, and you’ll have a smoother, more successful fishing experience. 🐠🎣🏆
Choosing the Right Tackle
🎣 Tackling the Tackle: How to Choose the Perfect Tools 🎣
Just as a painter selects the right brush for each stroke, an angler must choose the right tackle for the job.🎨 The tackle is your connection to the fish and can significantly impact your success in catching them.
Choosing the right tackle depends on multiple factors: the species of fish you’re targeting, the fishing environment (freshwater or saltwater, river or ocean), and even the time of day. For instance, a smaller hook and lighter line would be perfect for trout fishing in a serene stream, but you’d need a sturdier setup for wrestling with a catfish in a river.
The main elements of your tackle include:
- Hooks: Come in various sizes and types. Smaller fish require smaller hooks, while larger fish require larger, stronger hooks.
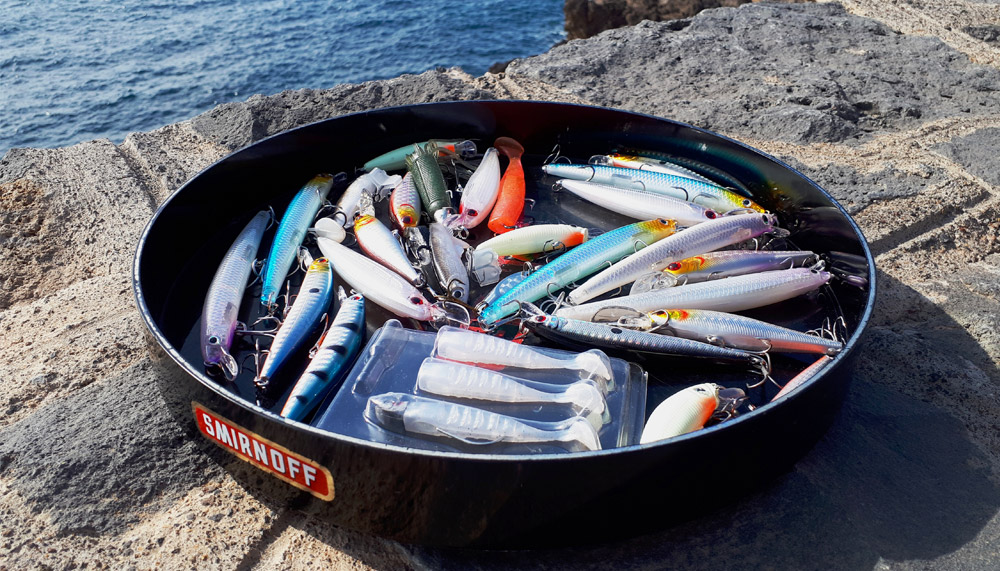
- Baits/Lures: Live baits like worms or minnows can be very effective, but artificial lures can also attract fish. The choice often depends on the species of fish you’re targeting.
- Sinkers: These add weight to your line, helping it sink deeper if your target fish are further below the surface.
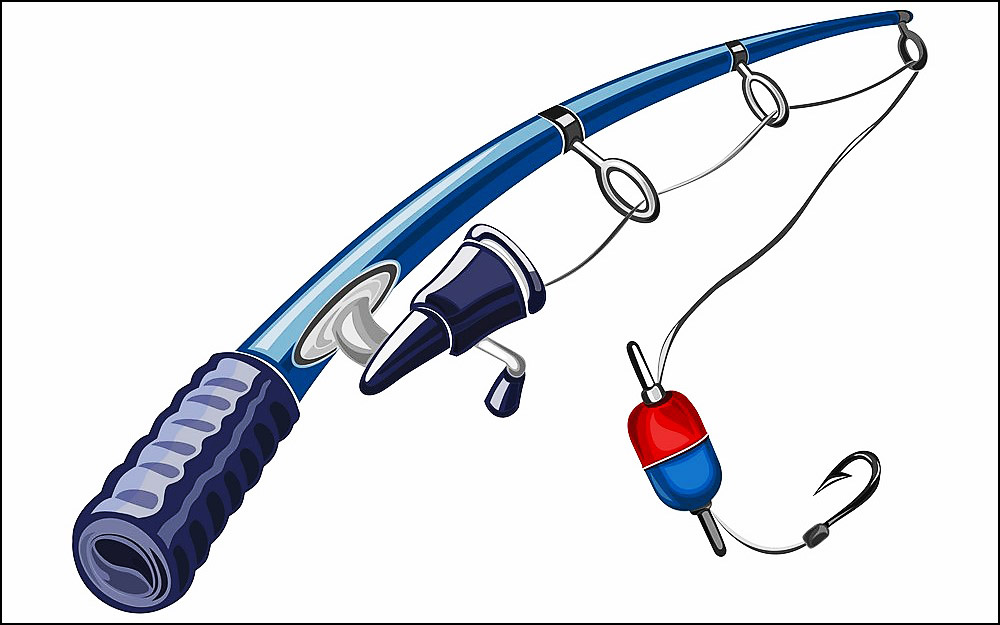
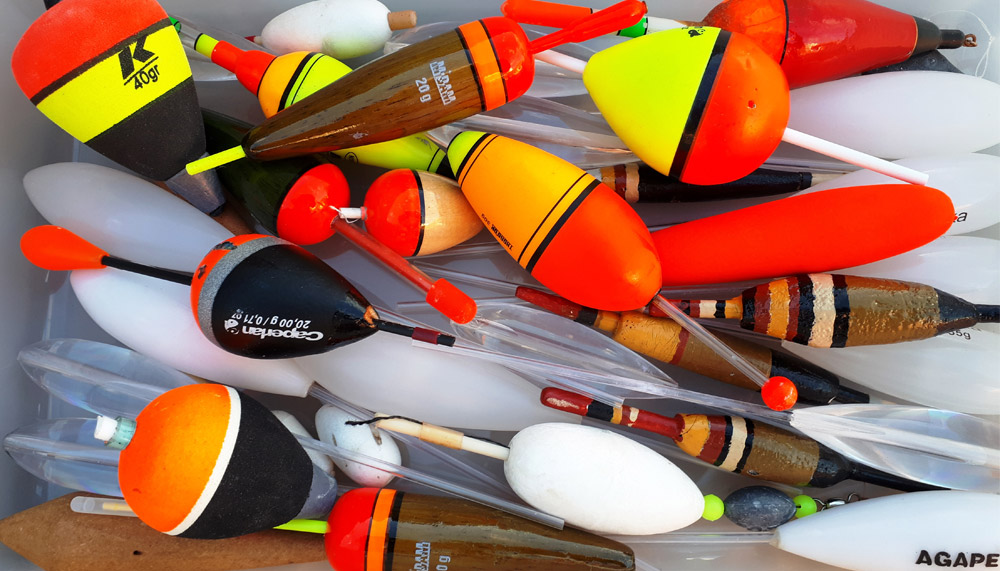
- Floats/Bobbers: These help keep your bait at the right depth and serve as a visual indicator when a fish bites.
- Lines: Fishing lines come in different strengths (measured in ‘pound test’) and materials. Choose a line that matches the weight and fighting power of your target fish.
🐠 Anecdotes from the Depths: When Tackle Choices Made or Broke My Day 🐠
Choosing the right tackle is a skill learned through time and sometimes, trial and error. I remember one time I was after some smallmouth bass in a local river. I opted for a sturdy, heavy-duty line and a large hook, thinking I’d have an edge. Unfortunately, the bass were more cunning than I’d expected. They could see the line and were put off by the large hook. My day ended with few bites and no catches.🙁
In contrast, on another trip, I was targeting walleye in a deep lake. I used a lighter line, a smaller hook, and a live minnow as bait. This time, my rod barely got a rest – the walleye loved it, and I bagged my limit within hours. The choice of tackle made all the difference.🎣🏆
🔶Remember, choosing the right tackle isn’t about using the biggest and toughest equipment. It’s about matching your gear to your target fish and the environment, giving you the best chance of reeling in a big one. So choose wisely! 🎣🐟
Casting and Reeling Techniques
🎣 Mastering the Cast: The Key to Accurate Distance 🎣
After setting up your fishing pole and choosing the right tackle, the next challenge is mastering the cast. The art of casting involves more than simply throwing out your line – it’s about precision, distance, and accuracy. Here are some steps to cast like a pro:
- Grip: Hold the rod firmly but not too tight. Your index finger should be slightly extended, pointing towards the rod tip.
- Preparation: Reel in until your lure or bait is 6-12 inches from the rod tip. Make sure the line is properly threaded through all guides.
- The Cast: Lift the rod swiftly but smoothly, aiming slightly upwards. As the rod comes to about eye level, release the line.
- The Landing: Watch as the lure sails out towards your targeted area. As it hits the water, close your bail (if using a spinning reel), and you’re ready to start fishing!
🎣 The Reel Deal: Techniques for Bringing in the Big Ones 🎣
Reeling in your catch is where the real fun begins! It’s important to remember that reeling should be a smooth, steady process:
- Setting the Hook: When you feel a bite, quickly and firmly lift the rod tip to set the hook in the fish’s mouth.
- The Fight: Keep your rod tip up and apply constant pressure. If the fish runs, let it – just keep the line tight.
- The Reel In: As the fish tires, reel in your line, but stop if the fish makes another run. Patience is key here.
- The Landing: As the fish gets close, guide it gently towards your net or hands.
🎣 The Sensations of Success: Experiencing the Perfect Cast and Reel 🎣
When you make the perfect cast, it feels like a symphony. The whir of the reel, the swoosh of the rod, and the splash of the lure meeting the water create an exhilarating soundtrack to the experience. 🎼
When a fish bites and you begin to reel in, it’s a test of wills. There’s the steady pull of the line, the sudden tug as the fish tries to escape, and the thrill of seeing your catch break the surface.
🔶The sense of accomplishment when you finally land the fish is hard to describe. It’s a mixture of relief, pride, and sheer joy – the culmination of preparation, patience, and skill. It’s moments like these that keep us coming back, cast after cast, to the water’s edge. 🎣🐟🏆
How to Start Fishing?
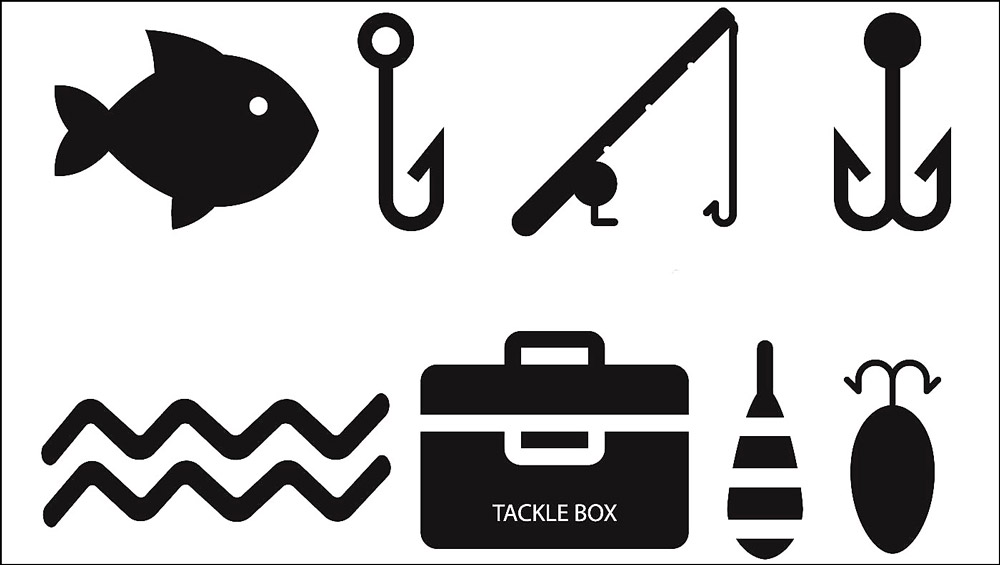
🎨 Visual Learner? Diagrams to Guide You Through 🎨
If you want to know how to assemble your fishing rod, you are in the right place! This is your first step toward fishing. Whether you’re a beginner or an experienced fisherman, you can still learn something new here. In this article, we’ll discuss the basic tools you’ll need. Then we’ll take a detailed look at how to set up a fishing rod in simple ways. You will need fishing equipment:
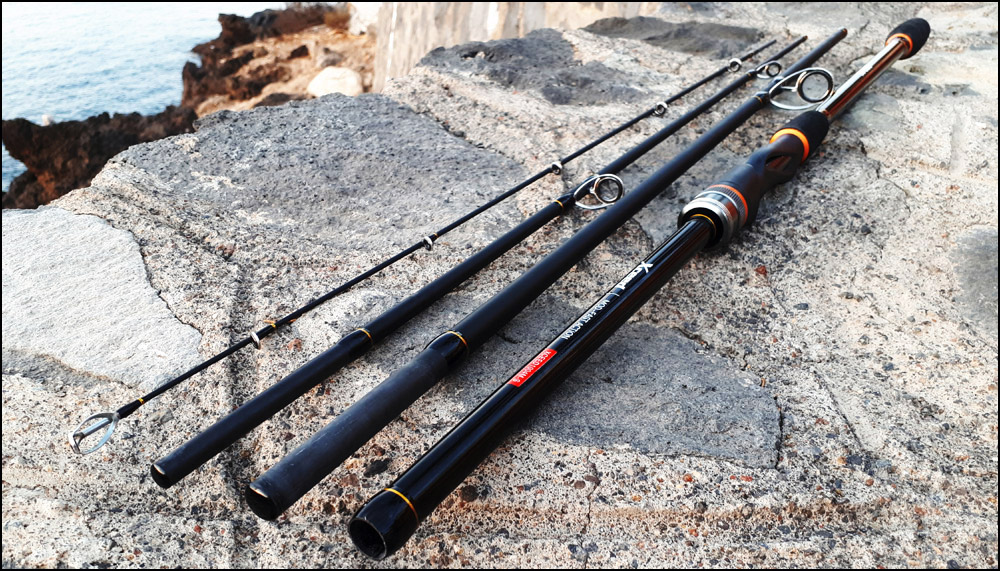
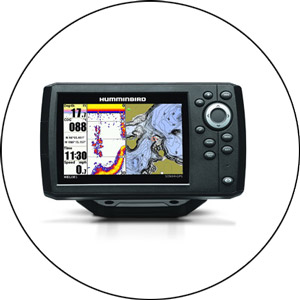
Fishing rod. It helps to throw your bait into the water, gives you the opportunity to hook the fish and pull your prey to shore. The type of fishing rod is chosen depending on the type of fish you are going to catch, as well as many other factors you will learn about later. If the catch is heavy enough, you will need a more reliable and sturdy rod. The rod can be either a single piece or made up of several pieces.
Fishing reel. Has a drum on which the fishing line is wound and stored, it allows you to pull the prey or bait, simplifies the process of fishing. The choice of reel depends on the type of fishing.
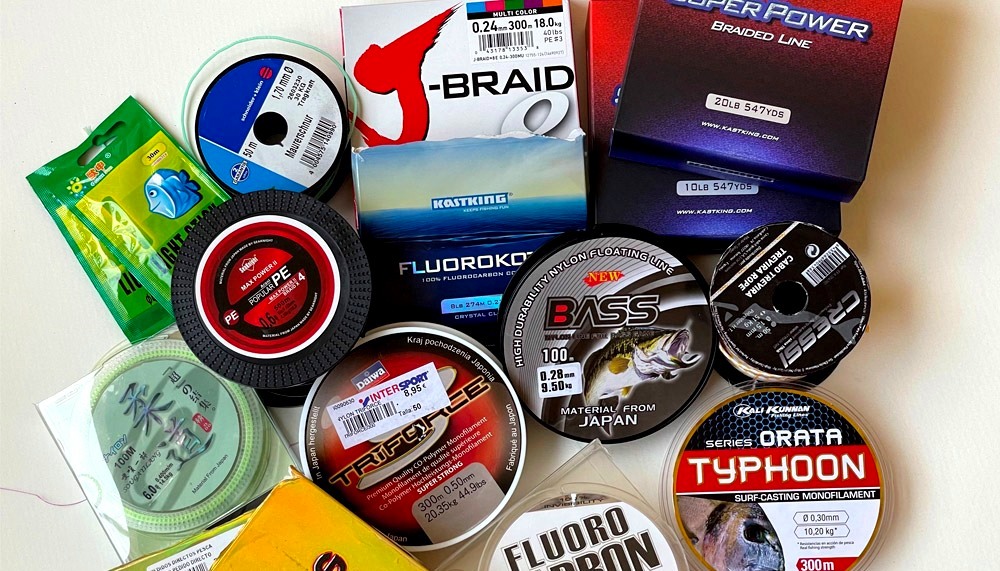
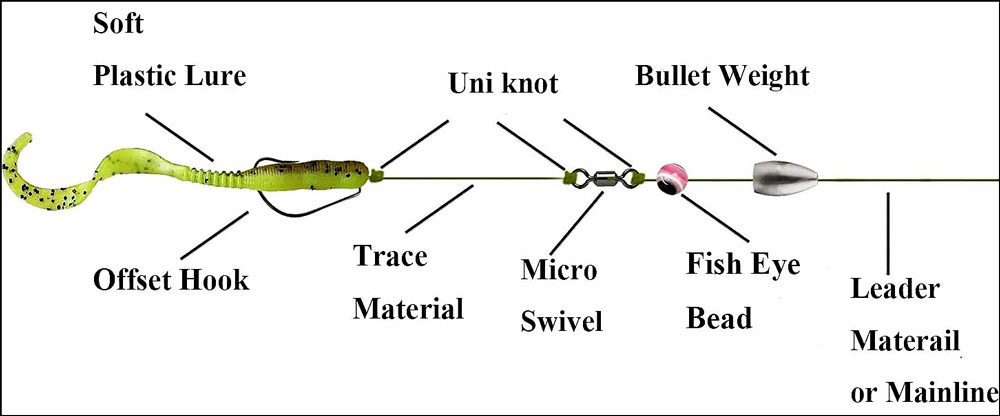
Fishing line & Braided line & Monoline & Fluorocarbon line. A fishing line is a fishing tackle that attaches a sinker, hook, swivels, beads, float, and bait. Anglers choose fishing lines based on their strength, weight, and material.
Baits & Lures. Baits can be artificial or natural (live) baits. In the case of artificial bait, a fishing line with a special knot secures the bait. Natural baits can be anything that fish like to eat in nature – worms, shrimp, small crabs, flies.
Choosing a Rod Type
Any fishing begins with the choice of rod type. Therefore, in this article, we will consider different options: fishing from the shore, float fishing, bottom fishing, spinning, and from a boat.
Float fishing – you need a long rod of medium power. Design – telescope, two or more pieces, or solid. Bait – bread, worms, peas, corn, etc. Types of float rods: fly rods, bologna rods, match rods, putter rods.
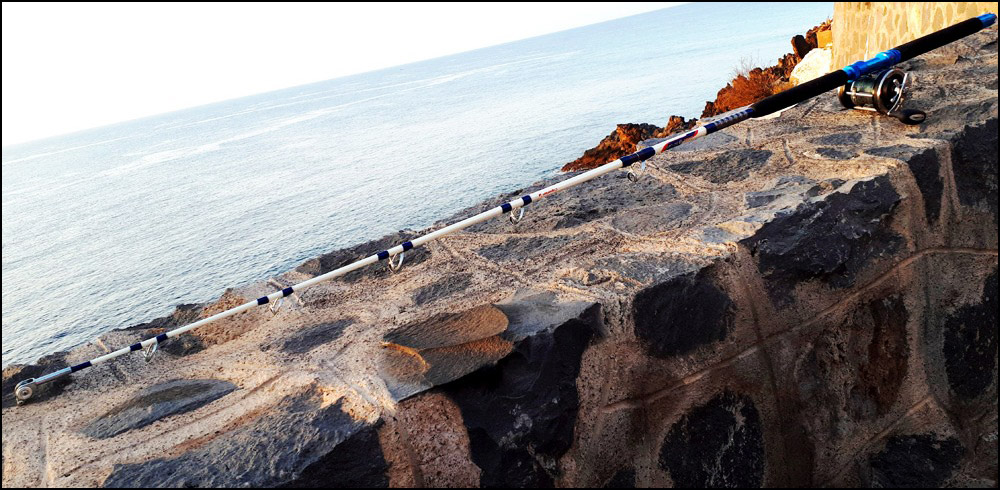
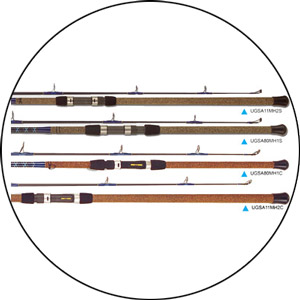
Surf fishing. A fishing rod for fishing from the shore. Used types of rods – telescope, multibody. Bait – worms, small crabs, shrimp, fish pieces, clams, mussel meat, sea worms (sandworms), and other bait. Marine bottom fishing rods differ: you can catch in strong winds, high waves, in considerable depth, and much farther from the shore. Weights for such rods have different shapes and designs: they can be flat, diamond-shaped, ground-tracked, etc.
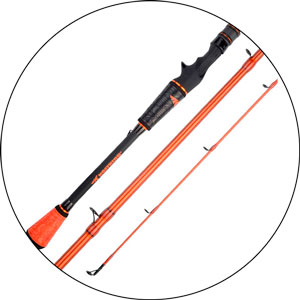
Spinning is a fishing tackle used to catch predatory fish. The main difference between spinning and other types of fishing rods is the throwing of artificial bait in the water and its wiring. Classic spinning consists of several parts: a rod with skipping rings, a reel, and a fishing line. The most popular materials for spinning rods are carbon fiber, fiberglass, and metal. For spin fishing, a flexible rod of two elbows is ideal. The elbows are connected by the sleeve of the rod. Lures (lures) – wobbler, baitfish, silicon, poppers, rattlins, jerk baits, foam fish, mandalas, and spinnerbaits.
Fly fishing – special rods with a short handle, flexible, lightweight, elastic with characteristics. Fishing is conducted in shallow water or on the water surface, and the use of sinkers and floats is not provided. Fishing is possible both with current and standing water, from the shore or boat, and in any weather conditions. Casting is provided by a special technique combined with the original design of the tackle. A special fishing rod (rod, whip) is the main element of the tackle. By appearance, the fly rod resembles a light spinning rod. The standard length – 2.7 meters, mostly two-handed versions (providing for gripping the handle with both hands).
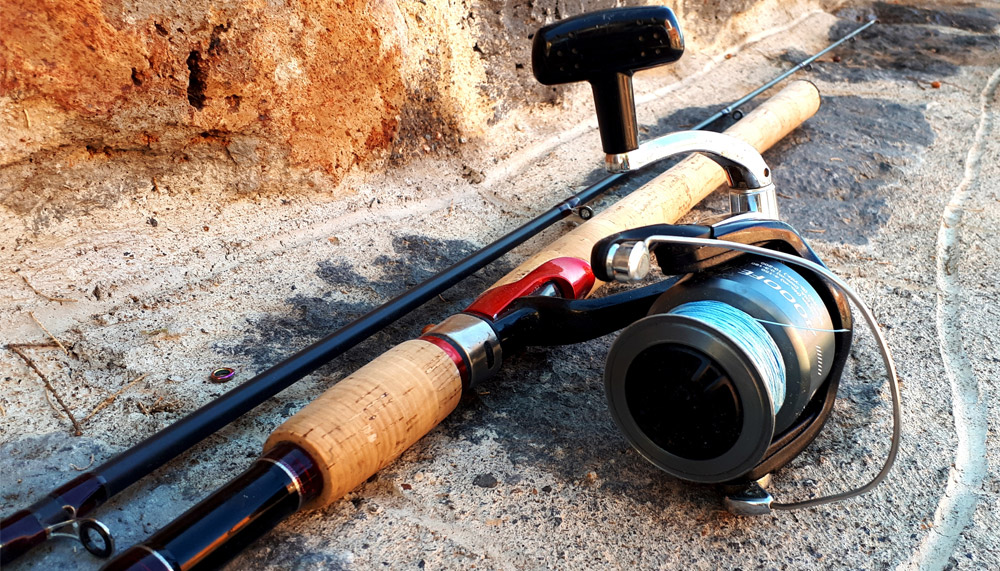
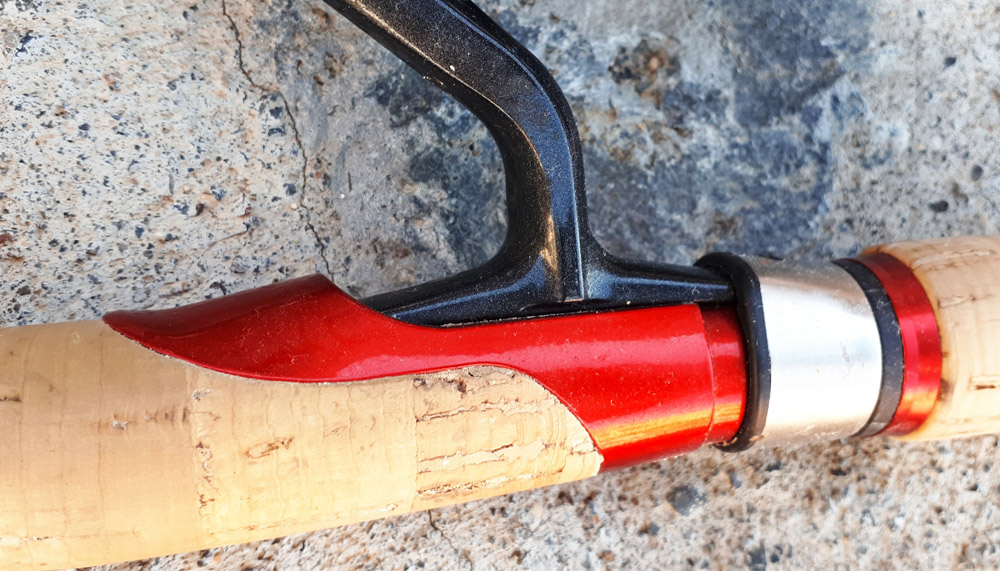
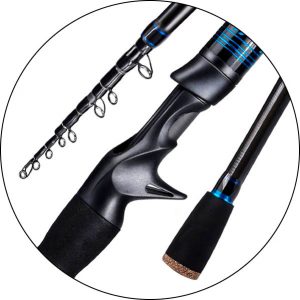
Baitcasting fishing – equipped with a stop and a special reel is needed. The casting rod is similar to the classic spinning rod, but has an extra element on the holder – trigger (or trigger? gun handle, pistol grip), which helps to fix the rod in your hand while fishing. The grip occurs in such a way that in the fisherman’s hand there is not only a rod but also a reel. Casting rods have rings of smaller diameter and in a larger quantity than on a classic spinning rod, this is due to the peculiarities of casting with a multiplier reel.

Fishing from a boat. Fishing from a boat is carried out with different tackles. The most popular is the onboard fishing rod. It is shorter than usual and most often solid with a characteristic roller tip. The bait – live fish, bobber, wobbler.
Important! A general requirement for types of fishing rods – to assemble the rod so that the rings are in one line along the rod evenly without tilting. Tightly fasten the knees between each other or pull out all the links of the telescopic rod to the stop.
How to Set the Rod
It is important to choose a type of fishing that matches the behavior of the fish you are looking for. It would be ideal to know the biology, peculiarities of the body of water, and the habits of each fish species. There are some fish that feed on the bottom and others that feed only in shallow water. Some fish feed on other fish, while others prefer insects or only eat at night.
Step 1: Prepare the Rod
Before how to set up your rod, you need to clean it. Wipe off dirt, sand, and bad smells with a cloth. You need to know the main parts of the rod:
Fishing Line Sections. A fishing line can consist of 2 or more fishing lines. The joint where they fit together is called the sleeve.

Rod Tip. The tip is the most flexible part of the rod and is at the top of the rod. It is the last 4 inches of the rod and the thinnest part of the rod to help you feel when the fish are biting.
Spool. The spool is what the fishing line is wound around.
Guides. Guides are the circles through which the line itself passes and serve to keep the line close to the rod.
Reel Seat. This is the device into which the reel legs are inserted and which secures the reel to the rod.
Bail. The bail is a metal arm that can stop the line from coming out of the spool.
Reel Foot. The reel foot is like a puzzle piece that firmly connects the rod to the reel.
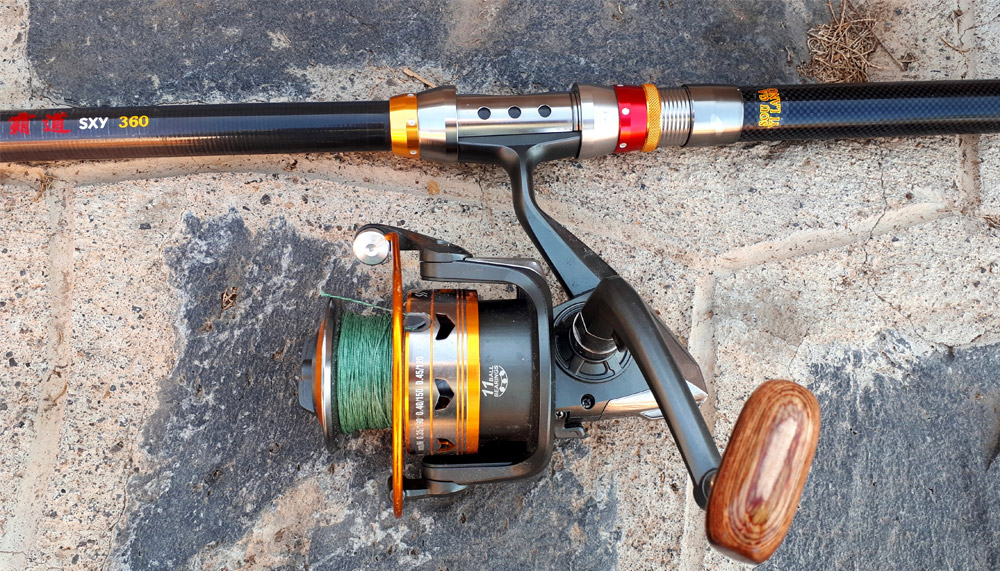
Line Roller. The line roller accurately guides the line from the spool to the rod.
Handle. The handle is often made of a soft material. This is what you will be holding on to the whole time you are fishing.
Step 2: Assemble the Rod According to Type and Construction
Set up the rod, if it has different parts, according to the assembly guide. Each part will have a tip to help you screw the part into the correct section. On the assembled rod, attach the reel.
Step 3: Attach the Spool to the Rod
Which spool is right for you? In addition to the rod, you need to choose the right reel for long life. For more useful information, read reviews on well-known informative sites such as Bass Pro Shops, Cabelas, or Fishreeler. The bottom of the rod has a place to attach the reel. Take the reel, slide it into the seat and tighten it tightly. Do this process slowly. Do not overtighten the reel or you may break it.
Step 4: Tying and Laying the Line
How do properly tie a monofilament line or braided cord onto the spool of a spool? First, you need to find the knot that will hold the first loop on the bobbin stationary – the self-tightening loop. Lift up the locking lever with the ribbon stacker. Thread the line through the lowest ring on the rod, then tie the line in a secure knot around the reel. Use a special knot to securely fasten the string or line to the reel. Tighten the knot until the line stops moving.
The easiest option:
Wrap the fishing line around the spool. The end of the fishing line should be enough to knot comfortably. Next, on the end of the fishing line should be tied a knot, pre-wrapping the fishing line going to the reel. Tying the knot should be so that the end of the line with the knotted angle slides on the main part of the line going to the bobbin. At the end of the line after the knot make another knot. This knot will be a stopper. After wetting and tightening the knots, trim the remaining end of the line so it does not interfere with the winding.
Next, reel the line on the reel.
Last. Thread the end of the line from the spool to the end of the rod through each ring (the guides are the rings along the rod that guides the line). Close the bale lever. Here are some helpful material – reviews and customer reviews of the major types of fishing line:
- Best Braided Fishing Line
- Best Fishing Line For Spinning Reels
- Best Mono Fishing Line
- Best Fluorocarbon Fishing Line
Step 5: How to Tie the Hook
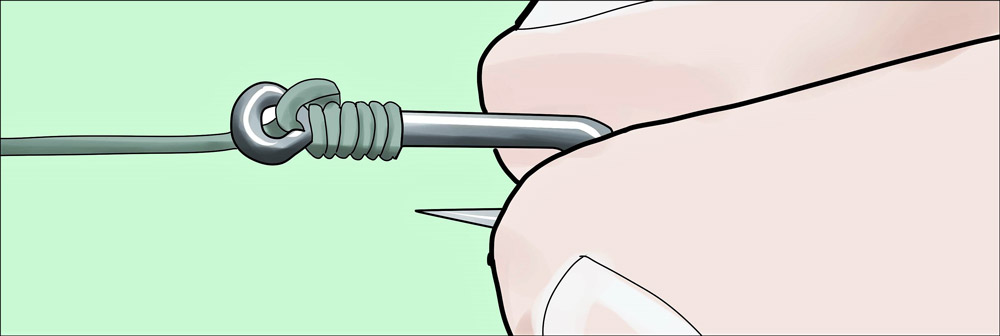
The next operation is to set the hook. The choice of hook and how to attach it to the line must be decided in advance. A hook is a metal fishing accessory, which is one of the elements of the equipment of various types of tackle, carrying the bait, making the hook of prey, holding the prey, and delivering it into the hands of the fisherman.
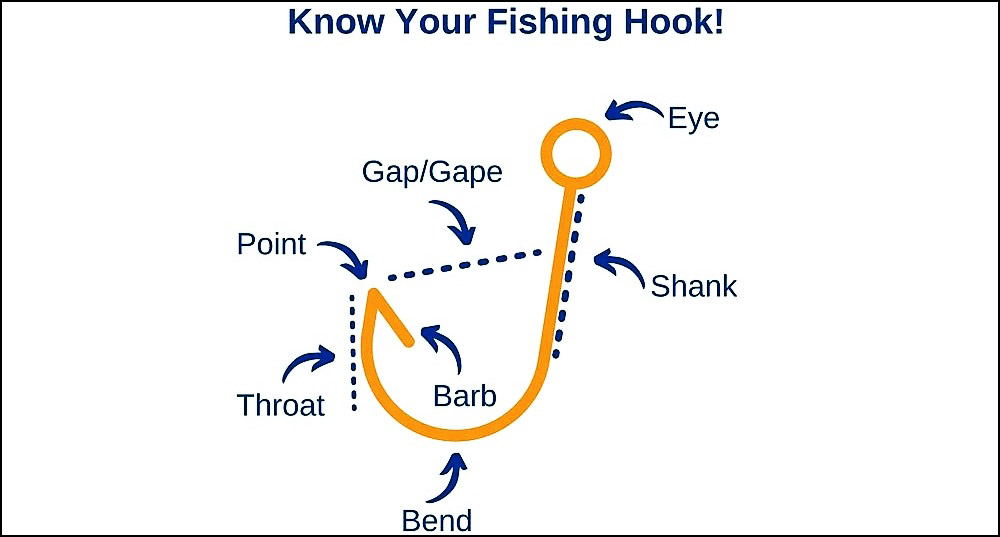
It is important to know the basic elements:
- Head. In this case, it refers to the point of attachment to the fishing line. The head can be made in the form of a loop, and in the form of a flat spatula.
- Barb. A long straight section running down from the head. For animal nozzles usually use variants with a long fore-end.
- Underbite. The curved section is after the fore-end. It can have a rounded, semi-circular, or angular shape. Doppelgangers and tees with a common forend have two or three underparts, respectively.
- Stinger. The stinger consists of the tip itself, designed to pierce the lips of fish, as well as the bit holding the bait and preventing the departure of prey. The stinger may be bent sideways, toward the forehead, or outward.
Step 6: Choosing and Tying the Bait
Before you cast the rod, attach the selected bait to the special knot. Each fish species requires different types of bait and live bait. All types of bait can be divided into 3 types: animal, plant, and artificial. The type of bait depends on the desired fish, the actual weather and type of body of water, as well as the fisherman’s personal experience and local conditions. Choosing the right bait is the most important condition for successful fishing. Depending on the weather, you can choose a specific color bait – for example, summer weather calls for silver or light bait. You can also choose a specific type of bait.
Tip! Take more than one type of bait with you when you go fishing.
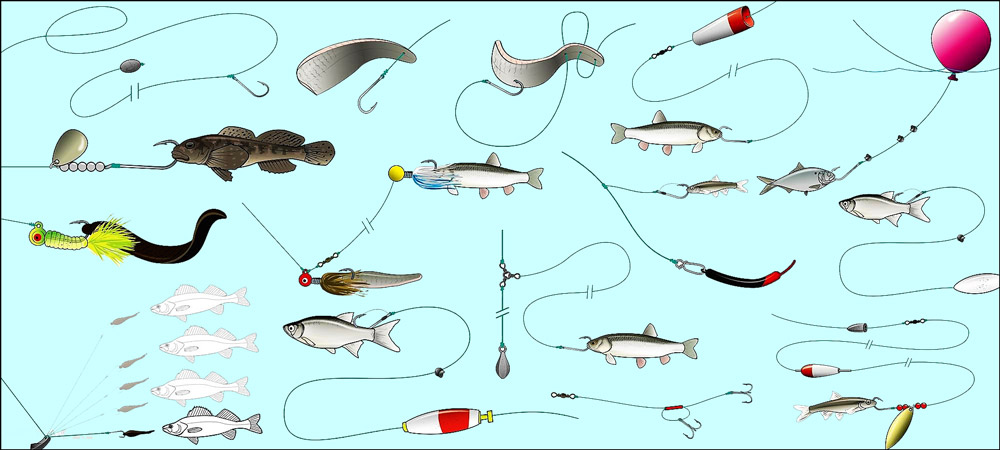
Lures used for different types of fishing rods:
- Float – grouper, worm, moth, minnow, insects, maggots, grasshopper, fly, shells.
- Spinning – wobbler, fishing spoon, trollers, topwater.
- Fly fishing – fly, dragonfly.
- From a boat – fish, wobbler, clam, robotic fishing lure.
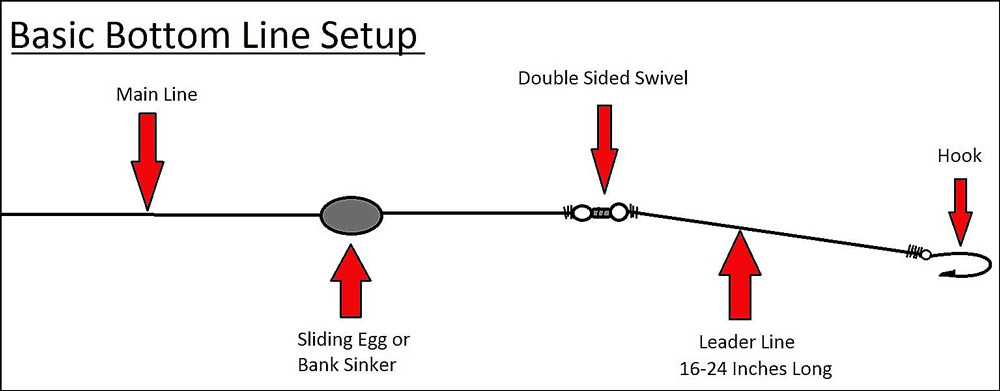
Step 7: Add Sinkers and Spinners
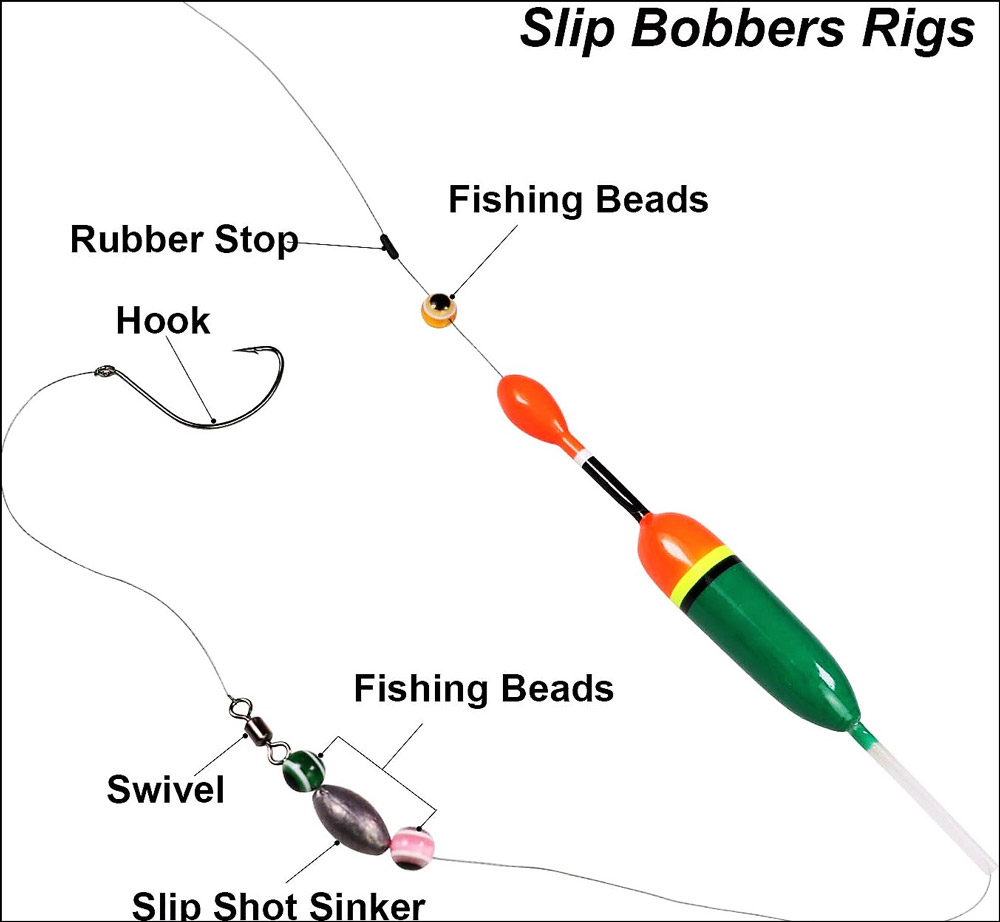
Before we begin mounting the tackle, it’s worth thinking about what kind of weights are best for this particular option. We choose a convenient knot and attach our weight in place, depending on the type of tackle in which it is needed.
The sinker – this is the oldest device used in the process of fishing, has the form of a small piece of lead, steel, brass, etc. In almost any form of fishing (with a few exceptions such as fly fishing) when mounting tackle we use sinkers. There are many varieties, depending on their purpose, type, shape, and method of attachment. To assemble the right fishing tackle you need to use a variety of rigs.
More often sinker is used when hunting for fish in order to level the float, as well as to achieve the hook with the bait at a particular depth and was properly configured. Also, the sinker is needed to throw the hook with the bait away from the shore.
Where to use:
- On a float fishing rod.
- Surf fishing to pull the line over the entire length.
- When fishing with spinning weights are needed for weighting the bait and for long throwing.
- From a boat to select the desired depth for bait (bottom edge, 0 to 2 meters off the bottom, or full-depth from 1 to 500 meters).
- When fishing on the Trolling additional weights adjust the depth of the bait or lure.
Hooray! My fishing rod is complete!
In the video you can see step by step in practice everything said:
Common Mistakes and How to Avoid Them
🎣 Don’t Get Hooked: Sidestepping Common Fishing Pitfalls 🎣
In the world of fishing, everyone starts as a beginner. And as a beginner, it’s common to make a few mistakes along the way. Here, I’ll highlight some of the most common errors I’ve seen (and made myself!) in the pole setup process, and share some advice on how to avoid them.
- Over-Tightening the Reel: It’s important to secure your reel to your rod, but overdoing it can damage both. Aim for a snug fit that won’t wiggle during use, but isn’t cranked down so hard it stresses the reel seat. 🛠️
- Improper Line Threading: Missing a guide or twisting the line while threading it through the rod guides can lead to poor casting and tangled messes. Ensure you thread your line smoothly and through each guide, starting from the rod tip and working down. 🧵
- Incorrect Knot Tying: An incorrectly tied knot can lead to lost fish and frustration. Practice tying a few standard fishing knots until you can do them without thinking. The improved clinch knot and the Palomar knot are two reliable choices. ⚓
- Inappropriate Tackle Choice: Using the wrong hook, bait, or weight for your target fish can result in no bites or broken lines. Do your research before you hit the water and adjust your tackle to match the fish you’re targeting. 🎣
- Poor Casting Technique: Overcasting or under-casting can spook fish or put your lure in the wrong spot. Practice your casting in a safe, open area to get the hang of it. Remember, it’s not about power – it’s about technique. 🚀
🎣 An Ounce of Prevention: Avoiding Mistakes Before They Happen 🎣
Fishing, like any skill, requires practice and patience. Here are a few preventative measures to help you avoid common mistakes:
- Practice: Familiarize yourself with your gear at home before you hit the water. Practice setting up your pole, tying knots, and even casting in your backyard.
- Patience: Don’t rush your setup. Take your time to get it right. It’s better to spend an extra few minutes at the shore getting your setup correct than spending hours with no bites because of a faulty setup.
- Research: Learn about the fish you want to catch. What kind of environment do they live in? What do they eat? The answers will help you choose the right gear and techniques.
🔶Remember, every angler makes mistakes. What sets successful fishers apart is the ability to learn from those mistakes and keep improving. So, keep these tips in mind, keep trying, and keep fishing! 🐠🎣
❓ Frequently Asked Questions: How to Set Up a Fishing Pole 🎣
🔶Remember, fishing is a journey of learning and experiences. Keep asking questions, and keep exploring the art of fishing. 🎣🌊🚣♂️
Conclusion: The Catch of the Day: Summarizing the Fishing Journey 🎣
Don’t forget the cardinal rule: fish have to be where you’re fishing. It must be there to live, feed or breed. It is important to be able to communicate with local, experienced fishermen who will provide helpful tips for the area.
Getting your fishing rod ready is pretty easy, and now that you’ve done it and practiced it, you won’t feel lost on your first day on the river or lake. We hope that our guide to setting up your fishing rod will help you catch your trophy and most importantly enjoy the hobby.
In this article, we’ve taken a deep dive into the world of fishing. From understanding the components of your fishing pole 🎣, setting it up with care, choosing the right tackle 🐛, mastering the cast and reel, and sidestepping common mistakes, it’s clear that fishing is an art that requires both knowledge and practice.
Fishing, however, is more than just a skill to master – it’s an experience that has the power to enrich your life. For me, every moment spent by the water is a chance to connect with nature, to embrace patience, and to experience the thrill of the catch. It has taught me respect for the aquatic world and the creatures that inhabit it. 🌊🐟
But remember, with the joy of fishing comes responsibility. Practicing catch-and-release, respecting fishing regulations, and leaving no trace in the natural environments we fish in are all essential aspects of being a responsible angler. The health of our waterways and the future of fishing depend on us. 🌎💧
So, here’s my final word to you, fellow fishing enthusiasts: venture out, cast your line, and soak in the wonders that fishing has to offer. Embrace every learning opportunity, whether that’s a successful catch or an unravelled knot. Every moment spent fishing is a moment well spent. 🎣🌅🏆
🔶Remember, the secret to a great fishing adventure doesn’t just lie in a well-set pole or the perfect cast. It’s about the respect for the sport and the love for the outdoors that keeps us coming back, cast after cast, to the water’s edge.
As I’ve found, once you’re hooked on fishing, it stays with you for life. So here’s to the next bite, the next struggle, the next catch, and the endless stories to tell. 🎣🌍💙
Cast Your Line: Joining the Conversation 🎣
Fishing is a journey filled with personal stories, unforgettable moments, and shared experiences. We’d love to hear about your fishing tales! Have you set up your own fishing pole yet? Experienced the joy of your first catch? Or maybe you’ve discovered a new favorite fishing spot? 🌍🎣
We invite you to share your experiences, tips, and questions in the comments section below. We’re always eager to hear about your unique fishing adventures and to answer any queries you might have. 💬👇
Plus, if you found this guide helpful, we encourage you to share it with your fellow fishing enthusiasts. Let’s continue to learn from each other and grow as a community of passionate anglers. 🙌
And remember, keep exploring, keep learning, and most importantly, keep fishing. Every cast is a new opportunity and a new story waiting to unfold. Let’s make those stories together. 🎣📖🚀
🔶So go ahead, cast your thoughts into the sea of conversation below. Your fishing journey is a story worth sharing. 🐟🌊🚣♂️

I live in Tenerife (Canary Islands) for the last 10+ years and share my daily fishing experiences on my website. Many years of personal experience as a fisherman and the vast experience of my friends allow me to write professionally on any fishing topics (from choosing a flashlight and equipment to deep-sea fishing).
All of my advice is based on practical real-world experience and will be useful to both novice anglers and professionals. Read more about the author.
Affiliate Disclosure: FishReeler.com sometimes gets paid for listings, through sponsors or affiliate programs like Amazon, Ebay, Cabelas, Bass Pro Shop, Shimano, Daiwa, Rapala, Renn, Okuma, KastKing, etс. Clicking a link helps keep FishReeler.com free, at no extra cost to you!
About the author: Each article is verified by the fishing expert Sergio Smirnoff. The articles are written by professional and amateur fishermen with 20+ years of fishing experience.
Note: The views and opinions expressed in this article are those of the authors and do not necessarily reflect the official policy or position of any agency. The articles are for informational purposes only, share your opinions in the comments and join the fishing discussions, let's share our fishing experiences together!


Thank you for providing this comprehensive guide, I am excited to try setting up my fishing pole now! Starting with a starter rod and reel combo and targeting large and smallmouth bass is a great way to begin fishing. These fish are easy to catch and provide a lot of fun. However, there are also other species to target, such as perch, chinook, walleye, catfish, and trout.
When it comes to lures, rooster tails, spoons, and topwater lures can be used. The technique for casting and reeling in these lures varies based on how you are reeling them in and flicking the rod tip to add more motion to the lure.
When it comes to bait, the author is not an expert as they only do saltwater fishing. However, they do emphasize the importance of knots. Learning how to tie the right knot for the right setup is crucial to avoiding losing tackle due to faulty lines. The author always carries clippers, a bait knife, a tape measure, and pliers in their tackle box. The pliers are especially helpful in removing hooks from fish with sharp teeth and preventing bites.
The type of line you use is also important. The line should be rated at the right pound test for the fish you are targeting. Heavier pound test lines are stronger and thicker. The drag on your reel is also important. If it is too tight, the line can snap when a fish comes by due to the force of the tug, or if the fish is big enough, it can pull your rod overboard. If the drag is too loose, you will have a hard time reeling in the fish because there is no resistance against it.
Finally, the author suggests visiting a local tackle shop to ask about what colors or baits are working at the moment. They can also advise you on where the fishing is hot right now. It is also important to check your state’s fishing laws, as a freshwater fishing permit may be required, and there may be size limits on the fish. The author recommends catch and release.
I appreciate the tips on choosing the right fishing line and bait, it’s a valuable addition to the guide. If you want to become proficient in fishing, it will take time and effort, including reading books and going fishing with experienced fishermen. To start, you must have a basic understanding of the equipment needed, which can vary depending on the type of fish you are targeting and the location of your fishing trip.
Next, you will need to learn how to wind a reel, as well as various knots that are essential in fishing. After that, you will have to make a decision on whether to use live or artificial bait and learn how to use it effectively, taking into consideration the type of fish you are fishing for and the location.
Finally, you will need to gain an understanding of fish behavior, which will help you determine where to find them. A local tackle shop can be a valuable resource for advice and tips, and it is recommended to visit one if possible.
It is important to note that before you start fishing, you should check your country, province, or state’s laws to see if a license is required.
The illustrations accompanying each step help to make the process even clearer. There are several types of fishing rods that one can choose from. To me, the best type of rod to start learning is the spinning rod. It has a curved bar of round metal, known as the bail, which can be flipped up to allow the line to come off the spool.
When casting, you simply pinch the line against the rod using your trigger finger, flip up the bail, release the line while casting, and then shut the bail. The spinning rod is considered to be very forgiving, and you can start by practicing short and lighter casts until you master the technique.
Spinning reels are very versatile and are the most commonly used type of reel. They can be used for various fishing applications, and most bass professionals tend to use bait casters, but even then, many of them use spinning reels for finesse applications.
Another type of fishing reel is the bait caster. To use it, you need to place your thumb on the spool, hit a button on the reel to unlock it, and then release the line while casting. You need to stop the spool from spinning as the lure gets close to the water, or else you may end up with a tangled line. Baitcasters are considered to cast more accurately in many cases and are popular for bass fishing with smaller low-profile reels and deeper sea fishing with big round reels.
Fly reels are another option and are cast by stripping the line off the reel with one hand, while your other hand keeps the line moving in the air using the rod until you cast it. A much larger and generally lighter floating line is used for this type of fishing.
Great article, very informative and easy to follow. If you are looking for fishing equipment, there are numerous online sources where you can find what you need at a reasonable price. For example, you can check websites like eBay, where you can find new reels for less than the manufacturer’s suggested retail price. Shopping online is a convenient option, as it saves you the trouble of physically visiting a store.
When it comes to spinning reels and rods, you can find a variety of options available on the market. A good choice for a spinning outfit would be a Penn Fierce II size 3000 reel, which is durable and efficient. This reel usually costs around $50, and you can find discounts on it during sales. To pair with the reel, you can consider an Ugly Stik Elite Spinning rod, 7′ M power, which is available for the same price. You can spool the reel with either a 20-pound braided line or an 8-pound monofilament line.
If you are considering purchasing another fishing setup, you can opt for a different size depending on what kind of fish you are aiming to catch. If you are mostly targeting smaller fish such as 3 pounds or less, you can go with a 2000 or 2500 reel and a medium light power rod, and spool it with a 6-pound monofilament line or 12-15-pound braided line. On the other hand, if you are targeting larger fish such as bass or catfish, you can go with a 4000 reel and a medium-heavy power rod, and spool it with a 30-pound braided line or a 10-12-pound monofilament line.
Regarding push-button reels, it is advised to avoid them as they do not perform well. Instead, you can consider going with the above-mentioned spinning setups for yourself and your girlfriend, as they are relatively easier to learn and use. With practice, you will both be able to cast the spinning reel accurately.
The step-by-step instructions are a lifesaver for beginners like me. To effectively learn how to tie a fishing knot, it is recommended to have a piece of rope and a large loop, such as a handle of a mug. One knot that can be used in a variety of situations is the Palomar knot.
This knot is useful for tying hooks, swivels, jig heads, and small lures because it avoids the difficulty of trying to pass a large lure through the loop.
However, for other applications, the improved clinch knot or the Rapala knot can be used. These knots are both easy to tie and have proven to be reliable. Although there are several other knots and differing opinions on their strength, these knots have served the individual well and can even be tied in low light conditions.